 MCPProxy
MCPProxy + Claude Code
Connect Claude Code
to your MCP servers.
Share MCP servers across Claude Code sessions with one local proxy. MCPProxy manages the upstream servers; Claude Code connects to one local MCP endpoint.
1. Start MCPProxy and add a server
Install MCPProxy and Claude Code if needed. Start MCPProxy, then open the Web UI address shown by your instance. With the default port, it is http://localhost:8080/ui/. Sign in with your instance’s admin key if prompted.
In Servers, add an MCP server you trust. For a first test, use a filesystem server confined to a folder containing a small test note. Review the server and approve the tools you intend to use; leave unneeded write tools unapproved.
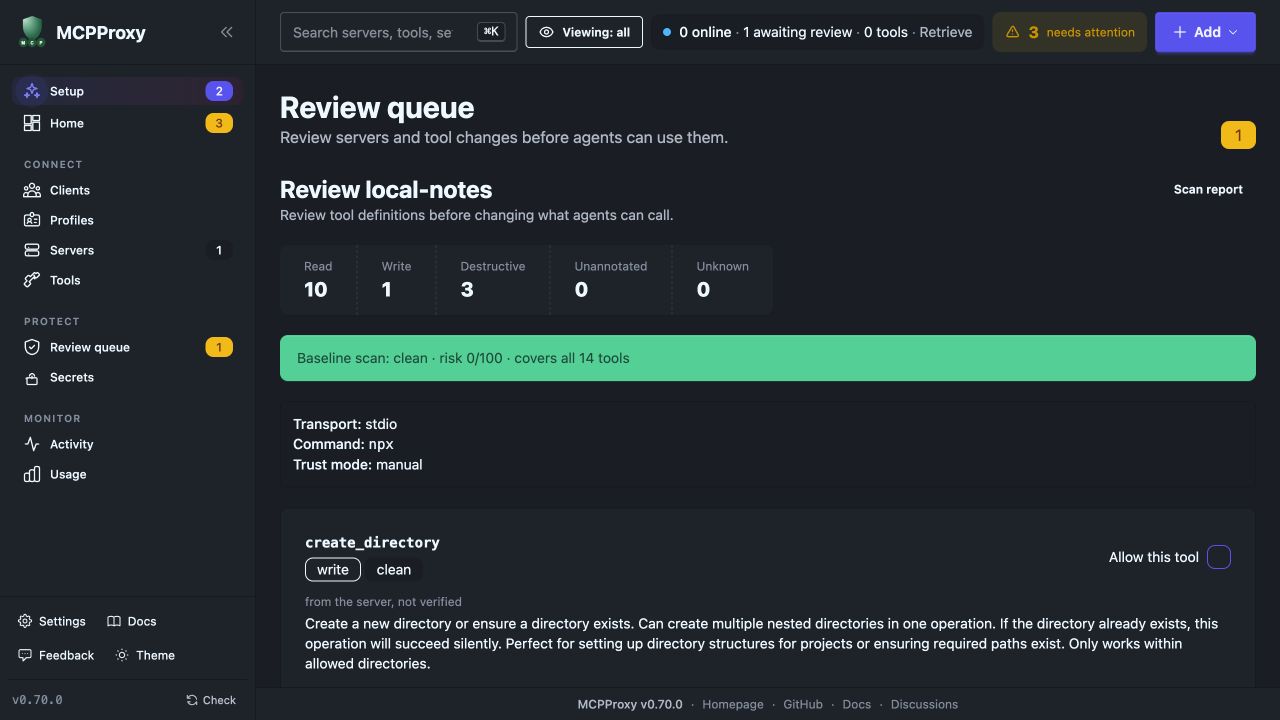
2. Review and connect Claude Code
- Open Clients → Connect client in the Web UI.
- Find Claude Code and choose Review & connect. The helper detects the configuration file; install and open the client once if it is missing.
- Review the proposed entry and file path. The helper normally targets
~/.claude.jsonin the account running MCPProxy. Pick a profile if you want a subset of servers; the default is All servers. - Select Connect. MCPProxy writes a dedicated client credential and backs up an existing configuration before changing it. If an entry already exists, review the replacement rather than adding a second one.
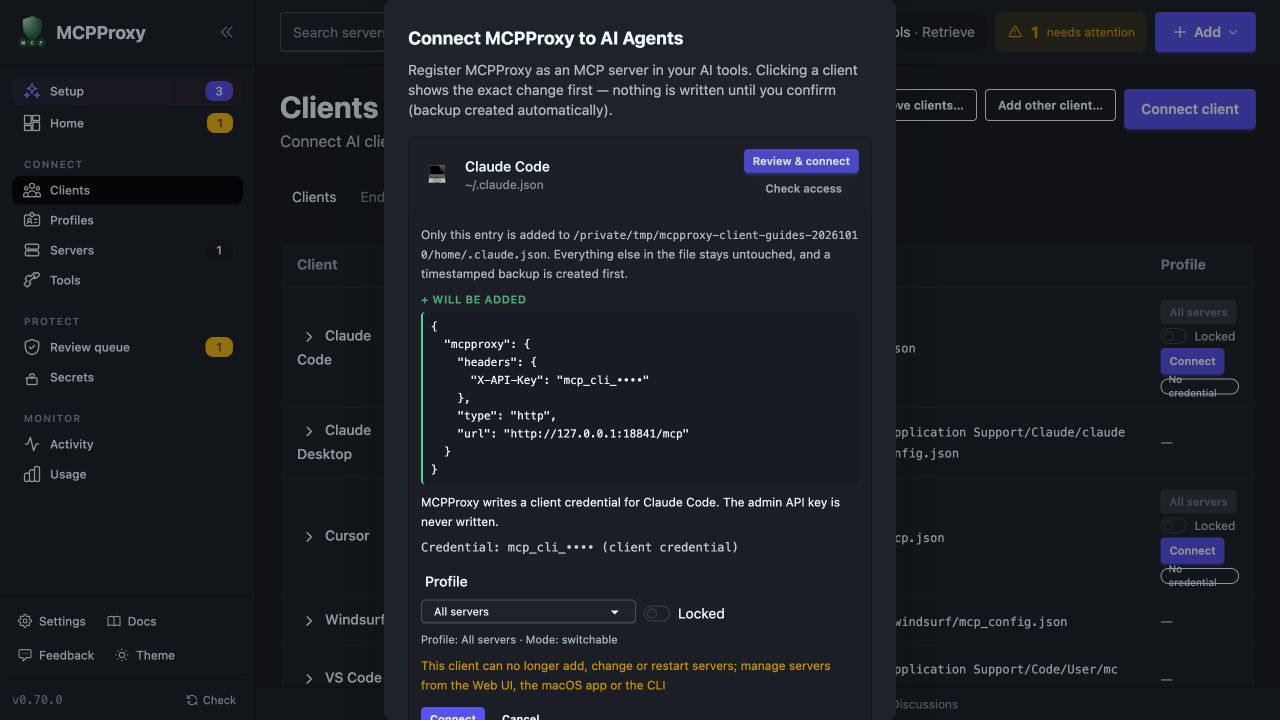
The generated file contains a private client credential. Keep it out of Git and shared screenshots. Manage upstream servers from MCPProxy’s Web UI, CLI, or macOS app.
3. Make your first successful tool call
Start a new Claude Code session. Run /mcp and check that mcpproxy is connected. If you use the project configuration below, approve that project server when prompted.
For the filesystem example, ask:
Use MCPProxy to find the read_text_file tool on my filesystem server. Read my test note and report its first line. Do not write or delete files.
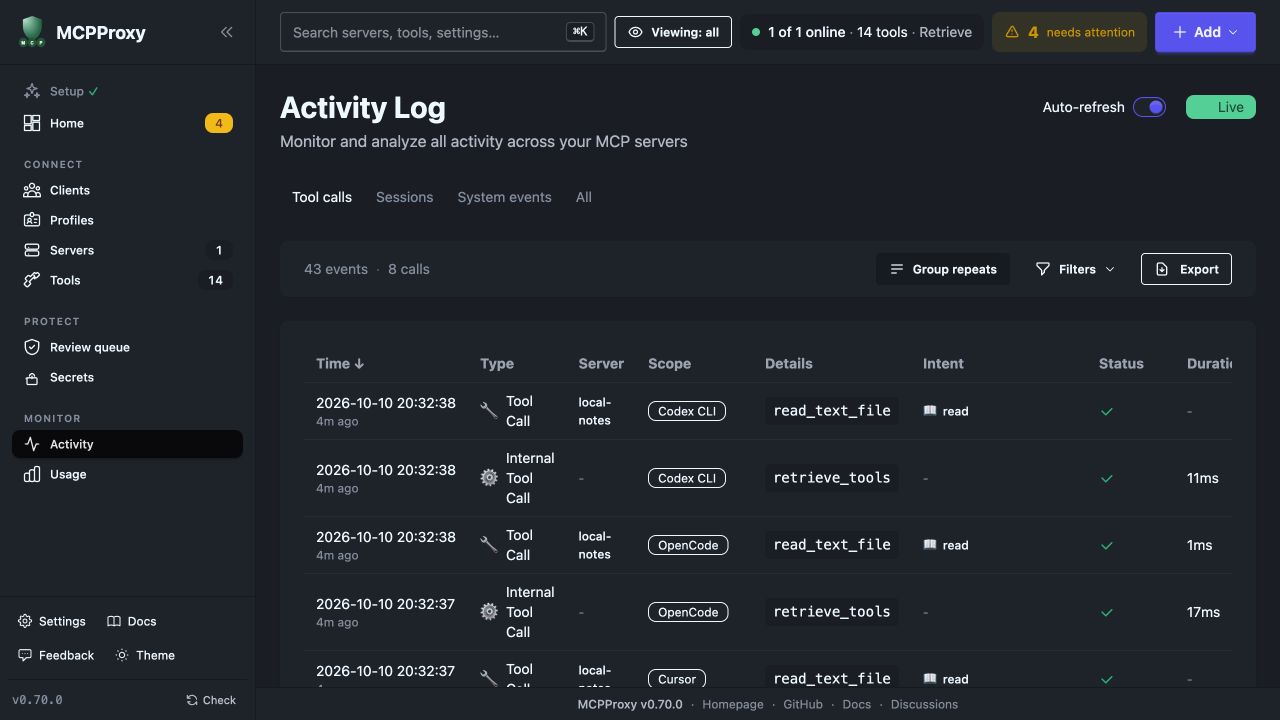
Give your client the actual path of the note in the server’s allowed folder. In MCPProxy Activity, look for an upstream Tool Call with Success and the expected server and tool. Confirm the content matches your note.
A saved client configuration or a successful retrieve_tools discovery call alone does not prove the upstream tool worked.
Manual configuration
Use this when the Web UI helper cannot access your client’s file, or you prefer an environment variable. In Clients → Add other client…, create a dedicated client credential, choose its profile, and save the credential shown once as MCPPROXY_CLIENT_TOKEN in your client’s environment. Use a client credential rather than the admin key.
Merge the entry below into .mcp.json in your project, preserving your other settings. Replace the default URL if your instance uses a different address.
{
  "mcpServers": {
    "mcpproxy": {
      "type": "http",
      "url": "http://localhost:8080/mcp",
      "headers": {
        "Authorization": "Bearer ${MCPPROXY_CLIENT_TOKEN}"
      }
    }
  }
}
The project example uses Claude Code environment variable expansion. Export MCPPROXY_CLIENT_TOKEN before launching Claude Code. The Web UI helper writes the user configuration instead.
Configuration reference: Claude Code MCP documentation ↗.
If the first call does not work
- The client is missing from Connect client
- Open it once to create its configuration. Check the file path and the OS account running MCPProxy. For another machine or account, use manual configuration.
- Connection refused
- Keep MCPProxy running and check the address and port. localhost refers to the machine running the client; a container or remote development environment needs a reachable endpoint.
- Unauthorized
- Check the client credential and its scope. For a manual environment variable, restart the client from an environment that contains it.
- No upstream tools, or a call is blocked
- Check Servers for a connected upstream, Review queue for pending approval, and the client’s profile for the intended server. Check Activity for the failure reason.
- Old or duplicate MCPProxy entry
- Use the preview to replace the old entry, then reload the client. Keep the backup until the new setup works.